
- Prepare the walls with rough plaster, and also prepare the floor by applying concrete plaster over the fill with a thickness of no less than 4 cm maximum and at one level and leave it to dry as in the picture.
.jpg)
2. Choose the type of tiles (ceramic or porcelain) for the space to be tiled from reliable suppliers, for example: ceramic for walls and porcelain for floors.
3. Transport the tiles safely to the tile installation sites to avoid breakage.
4. Ensure that the tiles are free from curvature before installation, if any, by examining the edge of the tiles with the naked eye (and not as is the custom by placing two tiles facing each other). This method is not a standard for measuring this, as in the picture.

5. The supervisor or tiler must determine the beginning and end of the tiles (the starting angle of the tiling process) in order to reduce the waste of tiles and avoid small joints in the spaces.
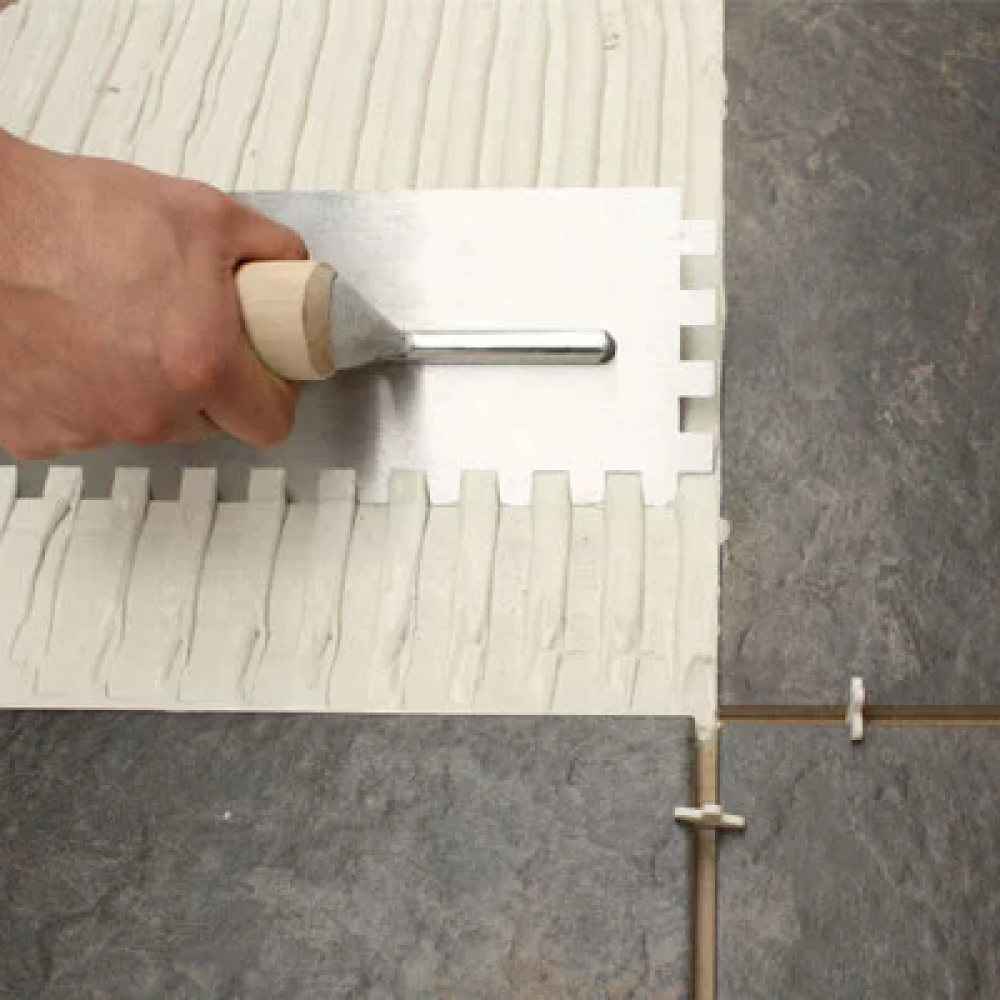
6 Installing tiles (ceramic or porcelain) with the glue designated for it. Ceramics (white soil or red soil) have a special glue that is widespread in the markets, and porcelain has a special, highly adhesive glue that is sold in specific centers. You must search for it and check the writing “special glue for porcelain” on the bag to avoid fraud.

7. It is preferable to install tiles (laser cut or regular cut) with gaps of no less than 1.5 mm in order to leave room for the tiler to weigh the tile installation process evenly and not as some believe that it is for expansion, given that these spaces are filled with grout that does not help in the expansion process. There is no objection to installing tiles (laser cut or regular cut) without gaps, but a professional tiler must be chosen to be able to weigh the tiles.
8. Rectangular tiles Example: Wooden tiles or any tiles that take a longitudinal shape are installed parallel or with an offset not exceeding 15 cm as in the picture.

9. Take into account the expansion joints in the internal areas under the sole before the tiles meet the wall (as in picture No. (5.1) with a distance of 4 to 5 mm and fill them with sealant to leave room for the tiles to expand if that happens as in picture No. (5.2). Also, a distance of 3 to 4 mm must be left at the entrance to the rooms (the area where the tiles meet) under the door as an expansion joint. The expansion joint in the tiles and plaster must be below it until reaching the fill as in picture No. (5.3). Also, take into account the expansion joints in the external areas every 6 meters with a width of 1 to 2 cm as an expansion joint and fill them with (packing rod + sealant), or use the expansion joints designated for that as in the picture.


10. Respect the direction of the tiles during installation. This is done by installing the tiles in one direction. This can be identified by either the arrow behind the tiles, the number if any, the factory logo, or writing the country of origin.
.jpg)
11. The tiler was instructed to place a bowl of clean water and a sponge to clean the glue directly before it dries from the visible surface of the tile so that it is not difficult to remove later.
12. The joints between the tiles are cleaned from glue to the depth of the tile thickness, in order to leave enough space for the grout to enter between the tiles, to avoid the grout coming out of its place in small thicknesses.
13. The tiles (installed with or without joints) are grout cleaned immediately with a wet sponge so that removing the grout from the tiles after they dry is not tiring. It is recommended to use Villa products for cleaning and protection after installation.